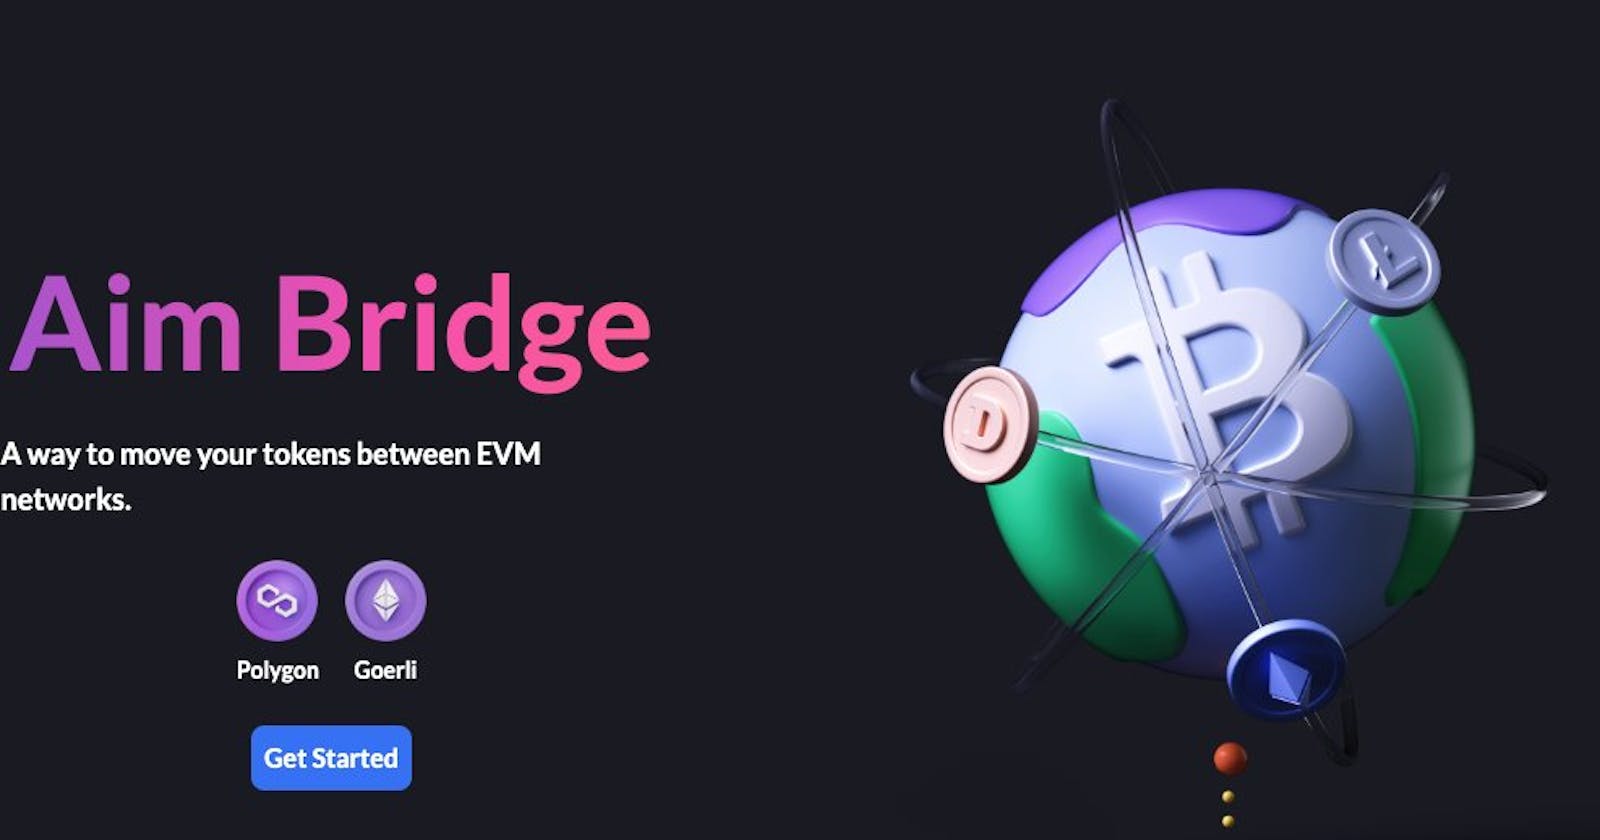


In the world of Web3, tokens can be used in a variety of ways. But cannot be shared between networks.
This is where bridges come in handy, allowing users to "move" tokens from one network to another.
Backend
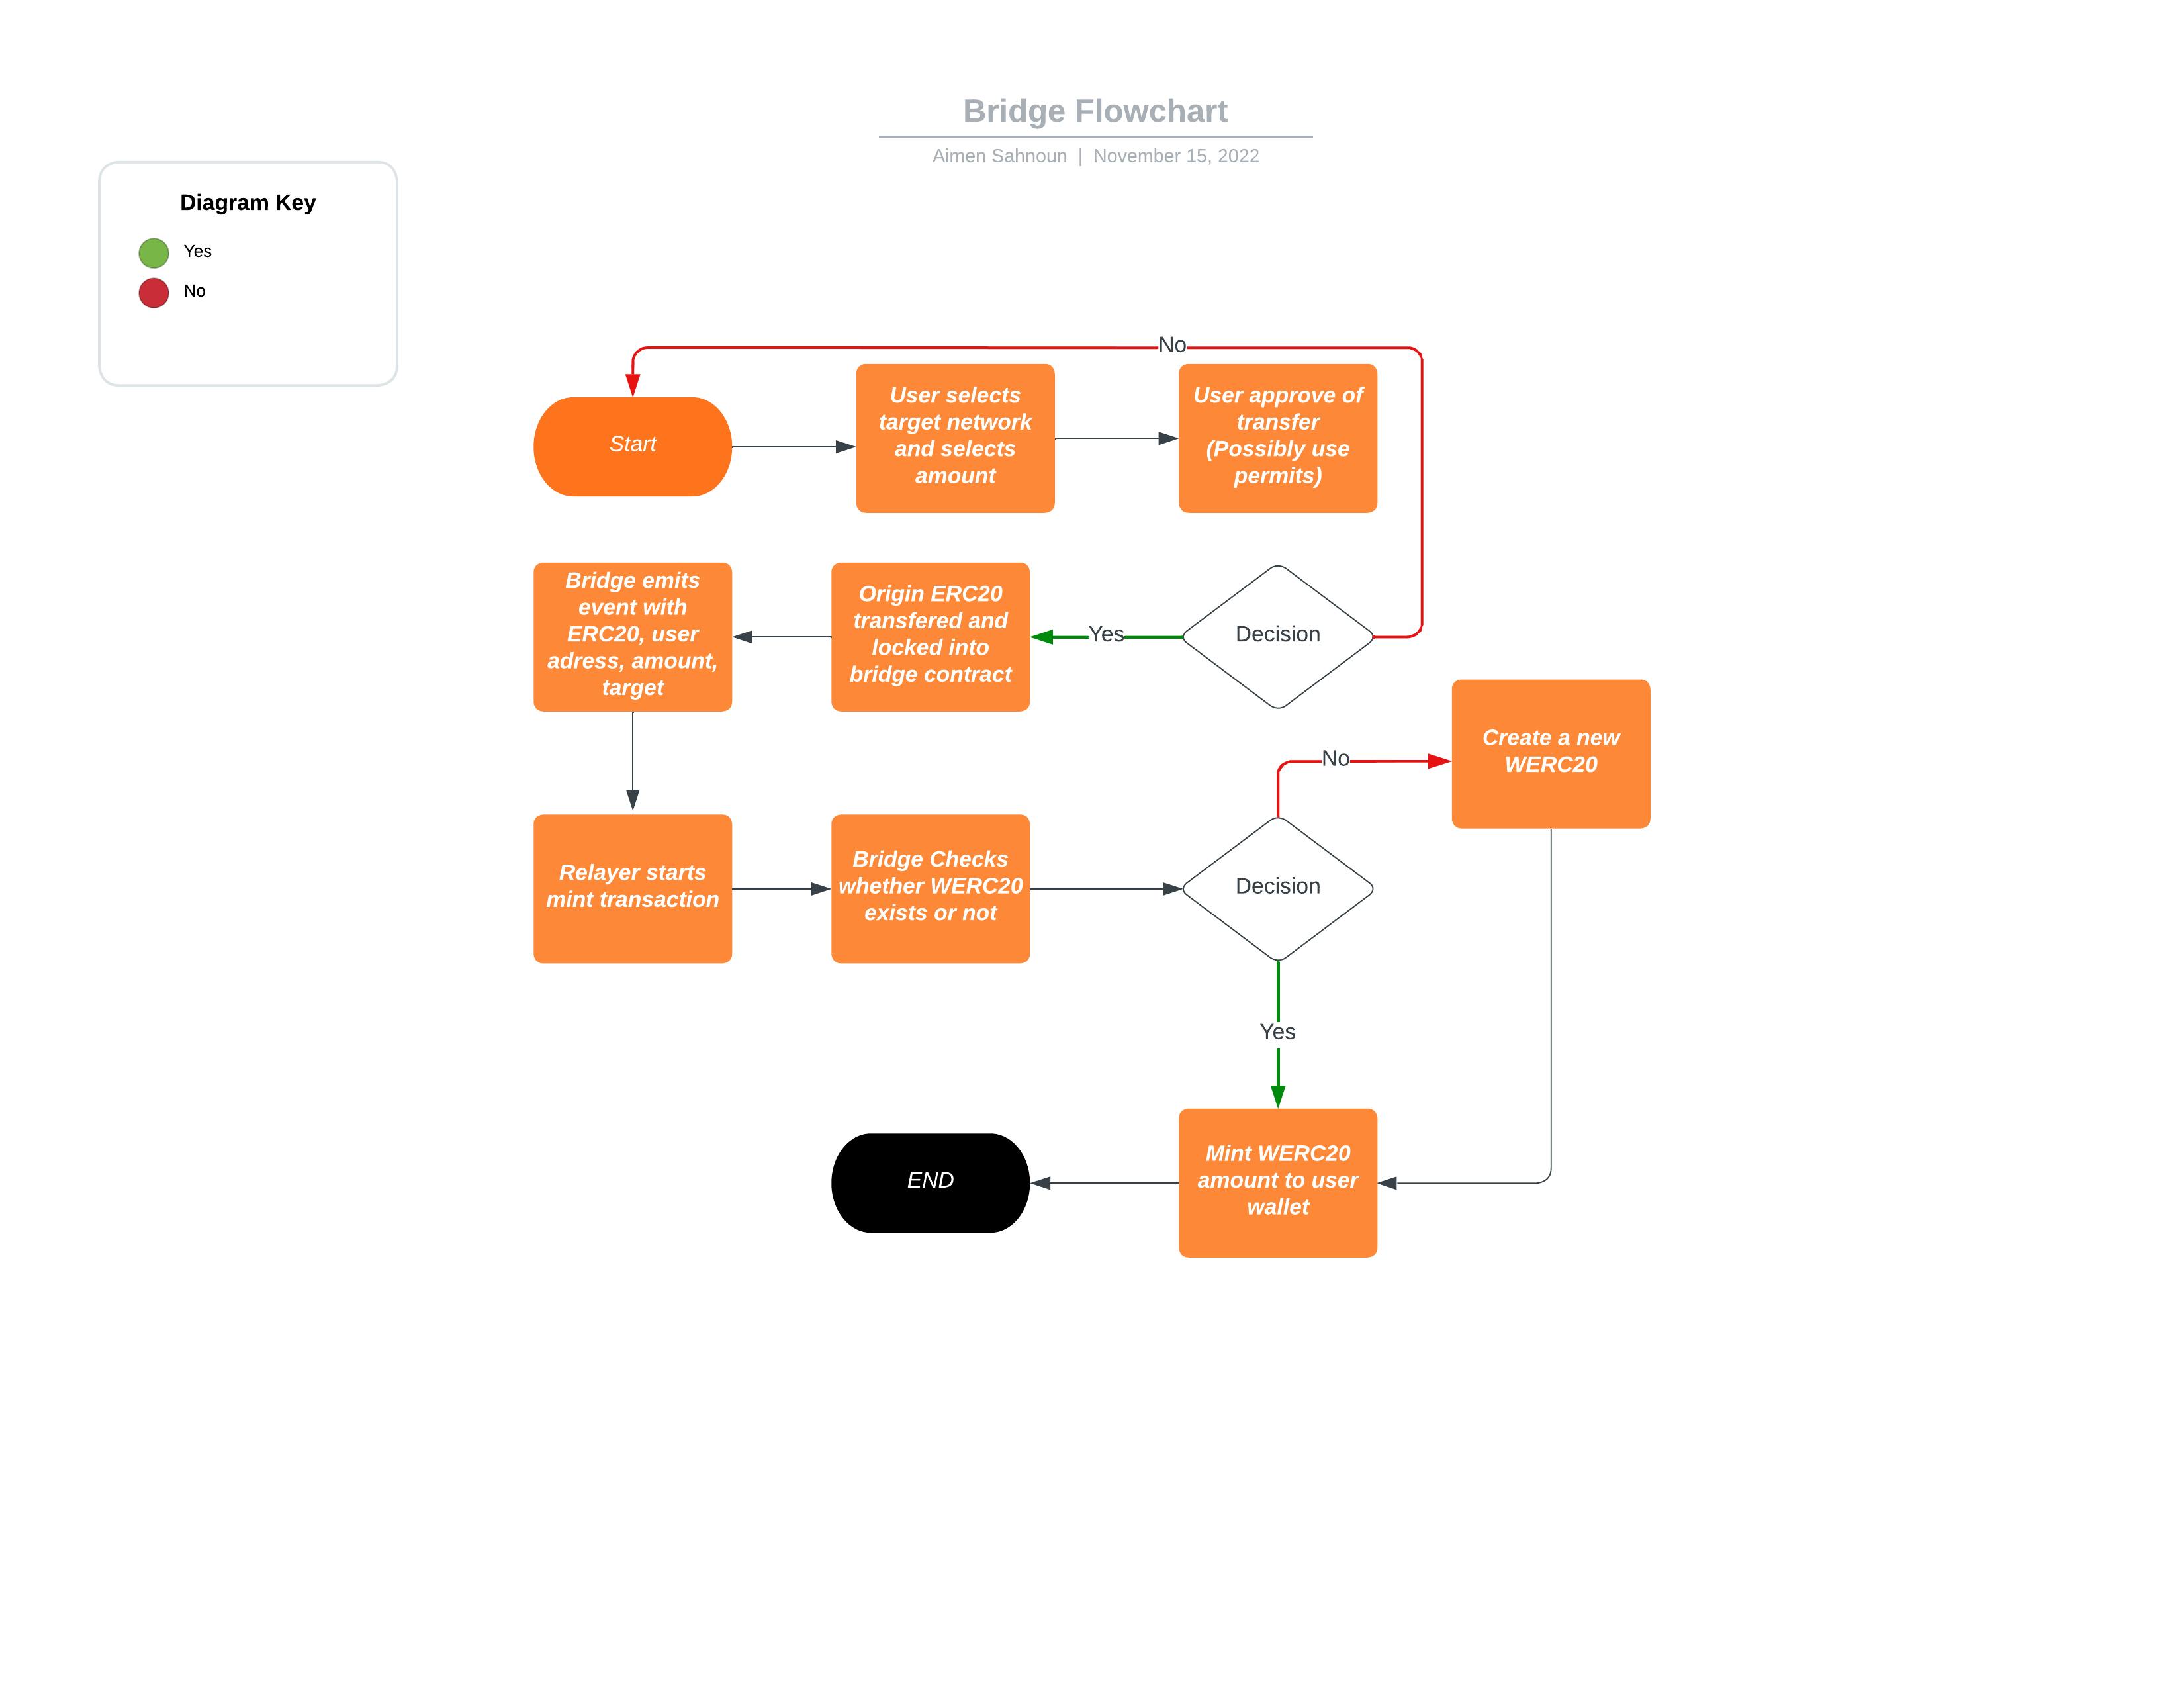
Usually bridges are developed by connecting a smart contract that is deployed on two different network, with a backend that would listen for important events and initiating transactions on the target networks.
This means that usually in order for the user to get the token they are transferring and locking wether ERC20 or ERC721 from a source network into a target network. The user then would have to switch to the target network and claim the token on the other side.
This is not a bad UX at all, but it got me thinking if there is a possibility to streamline the process by eliminating the step where the user has to change networks, and implement a system that does it for them automatically.
OpenZeppelin Defender
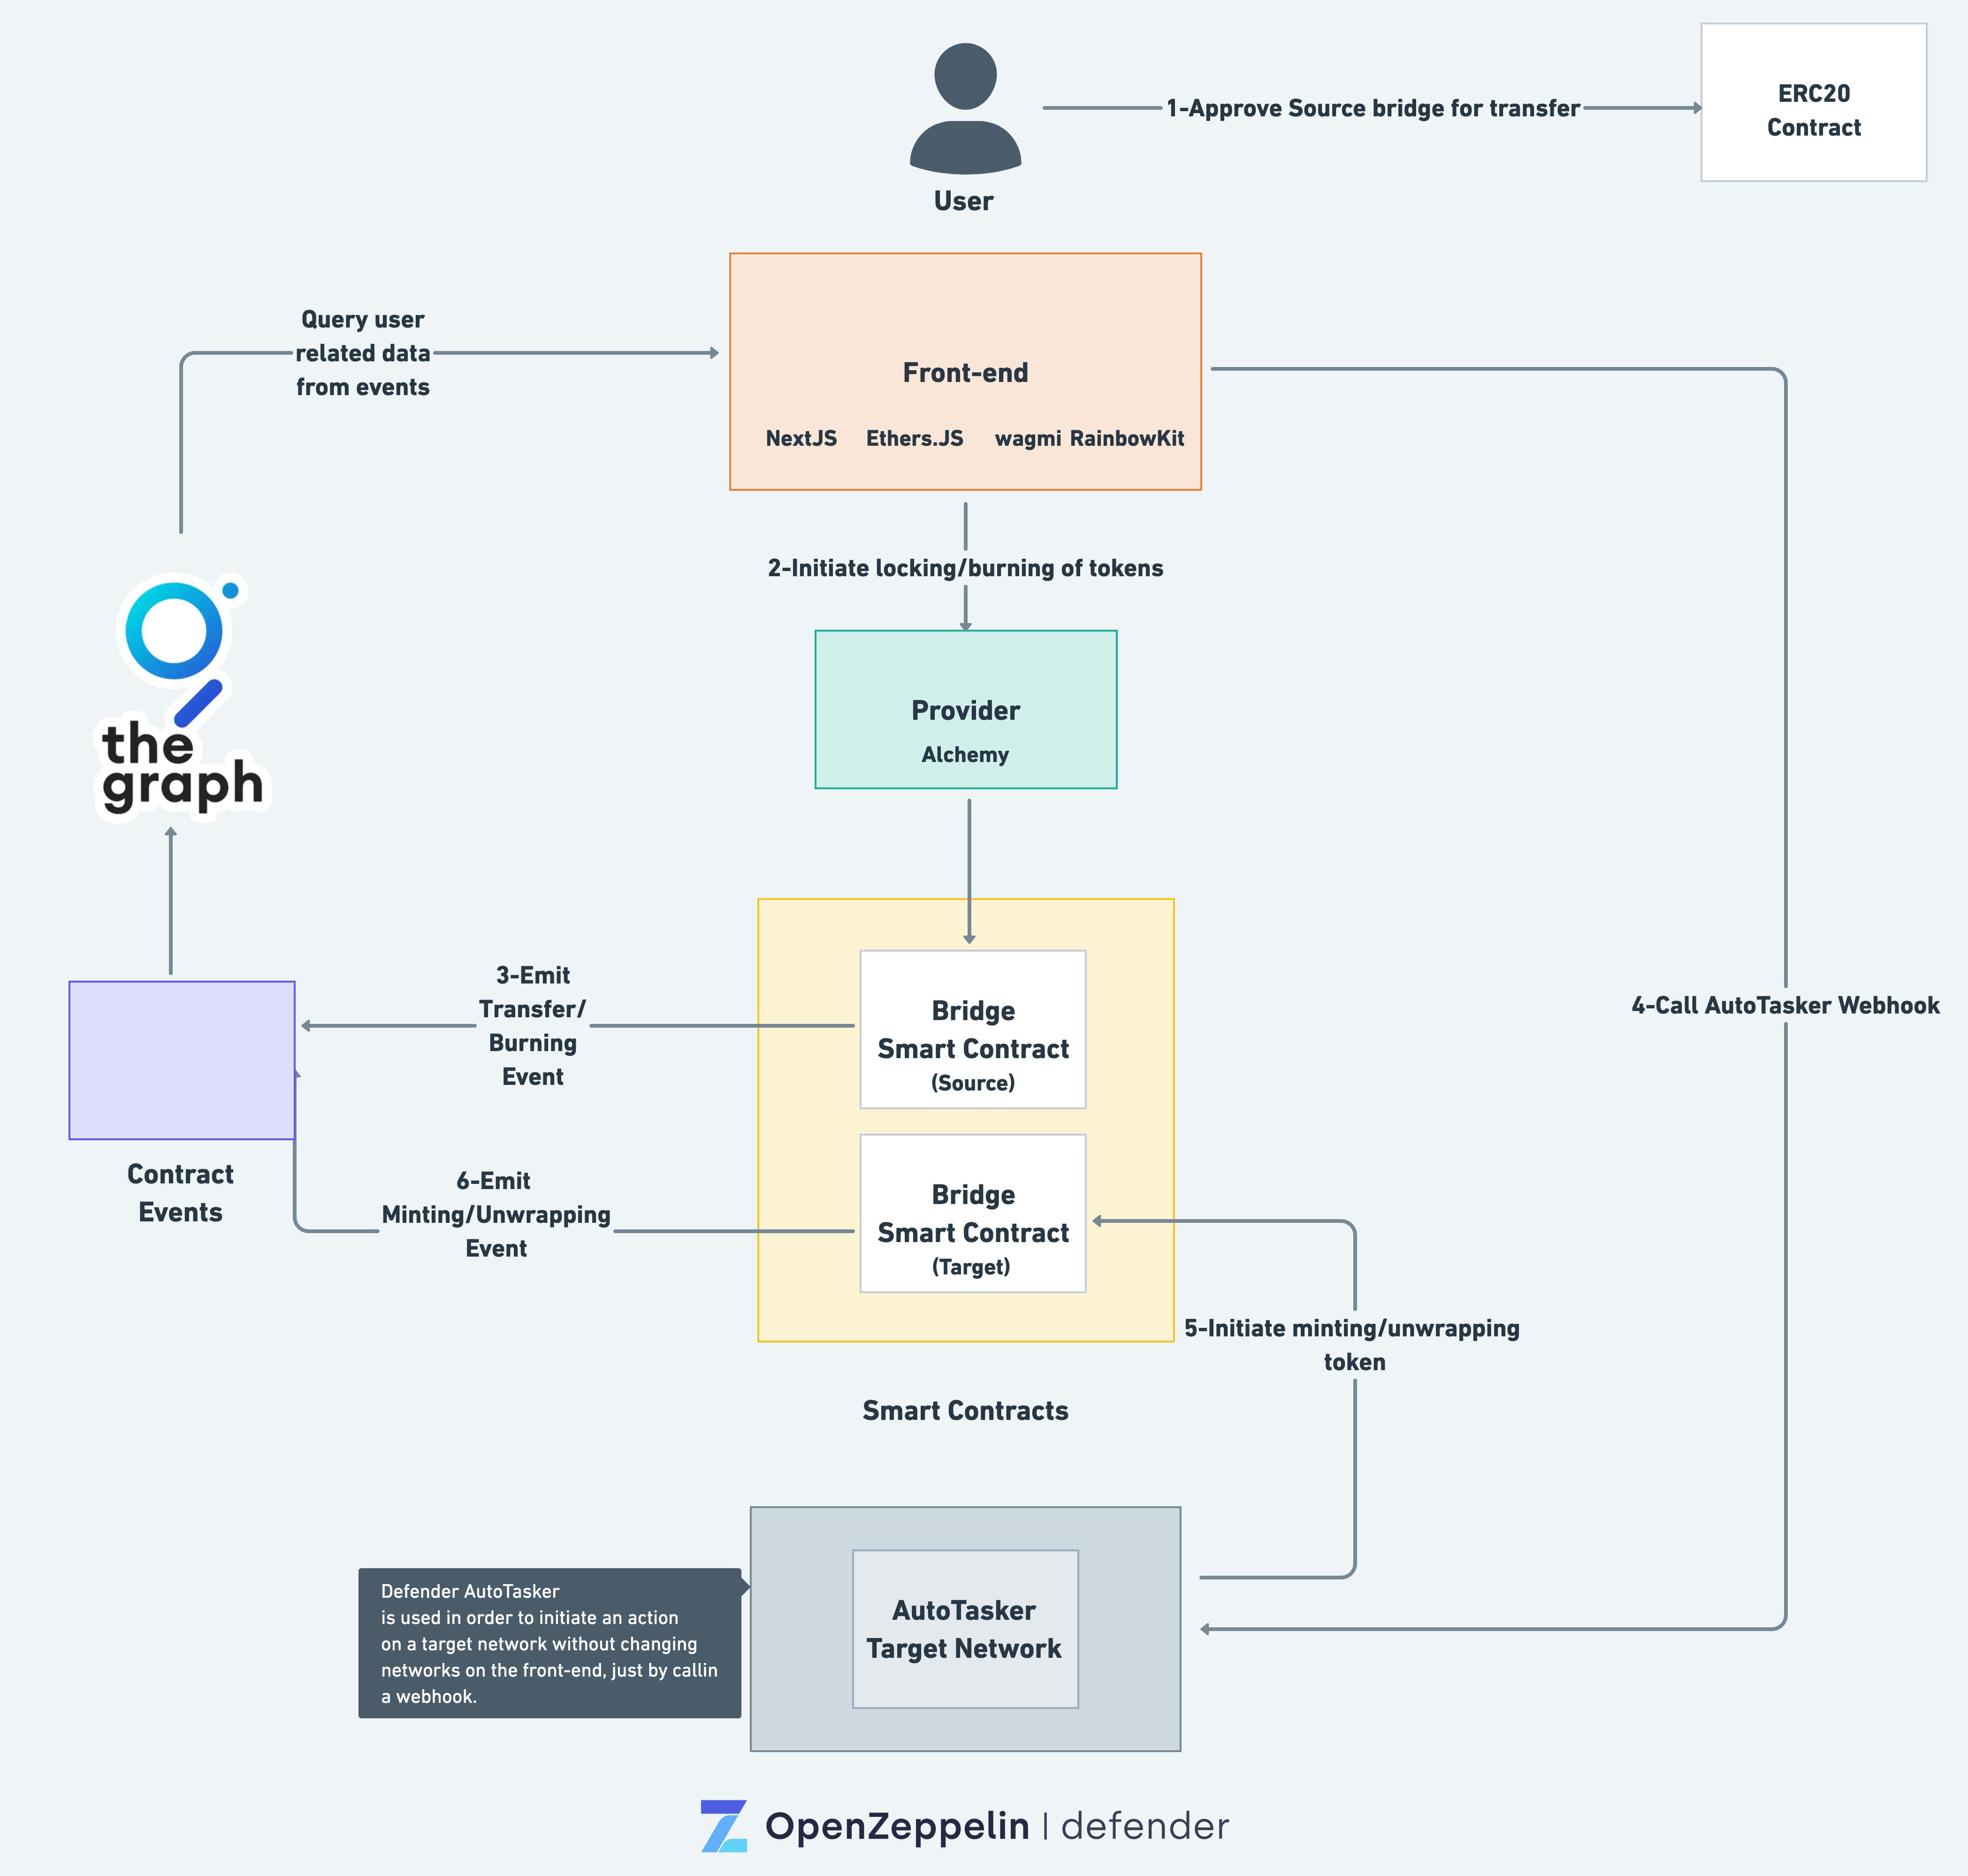
OpenZeppelin Defender is a perfect solution for this, with it's two services Relayer and AutoTask, this process was made into a reality.
By taking advantage of AutoTask, that runs a AWS Lambda every time a call is made, it is possible to just make a POST request the moment the locking of tokens is complete.
But how would we be able to communicate the data to the target network?
The main reason why users need to switch networks, is that you cannot communicate data and requests from one network to another, the whole point a bridge existing.
This is where OpenZeppelin Relayer comes in, Relayers are basically wallets created and held in the OpenZeppelin Defender panel, and are connected to a certain network, and then can be injected and used within the AutoTask.
So to answer the question, all we need to do is send a POST request to the AutoTask connected to our target network. And this will lead to us communicating the data directly.
Security
Now that we have solved the way to communicate our request, comes the issue of security.
- Can everyone just call the requests to the smart contract and
mintnew tokens? - Since we are getting as webhook url from
Defender, how can we avoid malicious requests? - How to secure a successful transaction against
replay attacks
Relayers
For the first issue, Relayers are back again to save us. By just implementing roles in the smart contracts we are able to limit access to critical methods to only the relayers, preventing random people from calling our sensitive methods.
Abstraction
To avoid the webhook from having too many needless requests and attacks, it is abstracted by using NextJS's - framework used in the project - route to abstract the call to the webhook, and hide also hide the actual webhook url from the network tab.
What's to prevent users from calling the custom API directly then?
In order to prevent that a secret message is used to secure the API, unless that secret key is provided the request will be rejected.
Replay Attacks.
The above mentioned methods are not nearly enough to prevent attackers from abusing our system, replay attacks are one the biggest issues in this architecture, since an attacker can submit a valid request to mint or release tokens, then repeat the same request infinite amount of times to take advantage of the system.

In order to prevent that, a timestamp+ hash method has been implemented, the way this method works is that instead of for the webhook to receive regular data from the front-end, it receives additional data with it. For example:
{
  timestamp : 1668893990, // A unix timestamp for when the transaction was initiated
  content : {....}  // Object of actual data
  hash : "f688ae26e9cfa3ba6235477831d5122e" // timestamp + data hashed together using a private key
}
Timestamp
The reason a timestamp is attached to the request, is to check how long ago was the transaction initiated.
If the transaction is older then a certain interval it is rejected.
if(current_timestamp - timestamp > 10 minutes) return `Timeout`
Hash
If the time is within the interval the webhook then proceeds to hash the data and timestamp again with the same private key as the front-end, if the hashes are equal , the webhook then calls the smart contract on the target network, if not it is rejected.
Example:
if( "f688ae26e9cfa3ba6235477831d5122e" === "f688ae26e9cfa3ba6235477831d5122e") // Returns true, allowed

if( "f688ae26e9cfa3ba6235477831d5122e" === "bfa99df33b137bc8fb5f5407d7e58da8") // Returns false, transaction is cancled
This means that if the attacker changes the timestamp or the data the hash is then invalid, leading to a rejected transaction.
And by implementing everything together, we would have our final result :)
Please not that this way of making a bridge is highly experimental and needs more security, and is not advised to actually go to production with